Compiling a C-64 Emulator to WebAssembly#
We use a variety of emulators in 8bitworkshop. Many of them, like most of the Z80 emulators, are written from scratch in JavaScript directly against our Platform API. This facilitates deep introspection into the emulator state, which comes in handy for things like debugger support and CPU visualization.
To save effort, we also integrate a couple of open source emulators. Atari 2600 support is courtesy of Javatari, and NES support is courtesy of JSNES. Each of them requires significant patching to expose hooks for the extra features the IDE supports, like breakpoints and bus-monitoring.
We can also use MAME, compiling it to WebAssembly using Emscripten. The trouble is that it’s a bit heavyweight and monolithic, and wants to be treated as an application, not a library. Due to the way it’s architected, interacting with the debugger via JavaScript isn’t really feasible. Even simple things like re-loading the ROM require a ton of Lua scripting.
Emscripten#
There are lots of open-source emulators written in C. What if we could use C emulation code as a library, and interact with it from JavaScript? It turns out we can use WebAssembly to do this.
At first, we might naturally consider using Emscripten. There are two methods for binding Emscripten-compiled C++ code to JavaScript, Embind and WebIDL. However, it turns out we don’t even need these frameworks, or even the full Emscripten wrapper. We can compile directly to WebAssembly using Clang alone.
Emulating the Commodore 64#
We’re going to emulate the Commodore 64. There are plenty of emulators, but which to choose?
The chips library contains no dependencies except a few standard library functions, so it’s a good candidate. Its README describes it as:
A toolbox of 8-bit chip-emulators, helper code and complete embeddable system emulators in dependency-free C headers (a subset of C99 that compiles on gcc, clang and cl.exe).
We just need a single C file to tie everything together.
In it, we include all of the files required for the C64 emulation.
We first define CHIPS_IMPL which instructs the preprocessor to include the function
implementations, not just the definitions:
#define CHIPS_IMPL

#include "chips/m6502.h"
#include "chips/m6526.h"
#include "chips/m6569.h"
#include "chips/m6581.h"
#include "chips/beeper.h"
#include "chips/kbd.h"
#include "chips/mem.h"
#include "chips/clk.h"
#include "systems/c64.h"
DIY Standard Library#
We also need a few standard library functions, like assert(), malloc(), free(), M_PI, memset(), memcpy().
It’s easier to roll our own (or rip off) the few functions we need.
For example, here’s our very simple malloc() function:
extern unsigned char __heap_base;

unsigned char* bump_pointer = &__heap_base;

void* malloc(unsigned long n) {
  unsigned char* r = bump_pointer;
  bump_pointer += n;
  return (void *)r;
}

void free(void* p) {
  // lol
}
Wrapper Functions for JavaScript#
To smooth out the interface between JavaScript and C,
we define a bunch of wrapper functions in c64.c.
C exports functions unless told otherwise,
so all are available to the JavaScript program via the module’s exports property.
For example, machine_init allocates a c64_t struct type and initializes the emulator with defaults.
c64_t* machine_init(char* bios) {
    c64_t* sys = (c64_t*) malloc(sizeof(c64_t));
    bios_array = bios;
    machine_hardreset(sys);
    return sys;
}
We chose the machine_ prefix so that we can potentially emulate other systems by just swapping out the WebAssembly file.
How to Use from JavaScript#
From JavaScript, we first load the BIOS binary:
var biosResponse = await fetch('wasm/'+this.prefix+'.bios');
var biosBinary = await biosResponse.arrayBuffer();
const srcArray = new Uint8Array(biosBinary);
Then we allocate a BIOS buffer in the WASM memory space with our own C malloc() function.
const cBIOSPointer = this.exports.malloc(0x5000);
This returns a pointer, which is just an integer representing an offset to the WASM memory space.
The entire WASM memory space is exposed to JavaScript via the memory.buffer export,
so we can map it to a JavaScript typed array:
const destArray = new Uint8Array(this.exports.memory.buffer, cBIOSPointer, 0x5000);
destArray.set(srcArray);
Now we can use the pointer returned by malloc() to call machine_init,
which returns a pointer to a c64_t emulator struct:
this.sys = this.exports.machine_init(cBIOSPointer);
The internal machine_hardreset does the minor heavy lifting.
It allocates a pixel buffer, pointers to the BIOS segments, and defines an audio callback function:
void machine_hardreset(c64_t* sys) {
    c64_desc_t desc;
    memset(sys, 0, sizeof(c64_t));
    memset(&desc, 0, sizeof(c64_desc_t));
    desc.pixel_buffer_size = c64_max_display_size();
    desc.pixel_buffer = malloc(desc.pixel_buffer_size);
    desc.rom_basic = &bios_array[0x0];
    desc.rom_char = &bios_array[0x2000];
    desc.rom_kernal = &bios_array[0x3000];
    desc.rom_basic_size = 0x2000;
    desc.rom_char_size = 0x1000;
    desc.rom_kernal_size = 0x2000;
    desc.audio_cb = audio_callback_fn;
    c64_init(sys, &desc);
    sys->pixel_buffer = desc.pixel_buffer;
}
The Compilation Process#
Now we need to compile all this stuff to WASM.
First we install a recent Emscripten SDK
and run ./emsdk_env.sh to set our command interpreter’s environment variables.
We compile to WebAssembly using Clang directly, a technique inspired by this blog post. Our Makefile looks like this:
# path to Clang binary used by Emscripten
CLANG="$(EMSDK)/upstream/bin/clang"

# builds the WASM and runs a Node test file
test: wasm/c64.wasm
	node --experimental-modules --experimental-wasm-modules wasm/test.mjs

# from https://dassur.ma/things/c-to-webassembly/
wasm/c64.wasm: wasm/c64.c
	$(CLANG) -v \
	-I. \
	-Iwasm \
	--target=wasm32 \
	-O2 \
	-flto \
	-nostdlib \
	-Wl,--no-entry \
	-Wl,--export-all \
	-Wl,--lto-O2 \
	-o $@ \
	$<
We type “make” and hey, it worked! We built a WASM file, but there’s no Emscripten boilerplate .js file:
-rwxr-xr-x 1 ... ... 97967 Dec 22 05:55 c64.wasm
Testing the Library#
We can test our WASM module with a simple Node test.mjs program.
We need to use experimental module support to include the WASM file like a regular module.
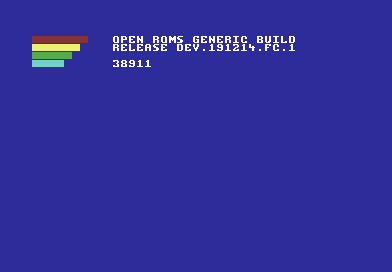
It runs the emulator for a few cycles and outputs a screenshot:
import * as c64 from './c64.wasm';
c64.memory.grow(32);

import * as fs from 'fs';
const bios = fs.readFileSync('wasm/c64generic.rom')

const cArrayPointer = c64.malloc(0x5000);
const cArray = new Uint8Array(
  c64.memory.buffer,
  cArrayPointer,
  0x5000
);
cArray.set(bios);

const sys = c64.machine_init(cArrayPointer);
c64.machine_reset(sys)
c64.machine_tick(sys);
c64.c64_exec(sys, 100000);

const pixels = new Uint8Array(
  c64.memory.buffer,
  c64.machine_get_pixel_buffer(sys),
  c64.c64_max_display_size()
);

// write raw RGB image (convert -size 392x272 -depth 8 RGBA:test.rgba test.png)
fs.writeFileSync('test.rgba', pixels);
The emulator interface doesn’t support everything yet – the CPU/memory bus hooks that provide data for the Memory/CRT Probe views aren’t implemented.
We can easily make WASM files for other platforms supported by the chips library, for example the ZX Spectrum, Acorn Atom, and others. We could also use the C interface to support other emulator libraries, as long as they don’t use too many standard library functions.